» Recipes

An ode to consistency and cheesecake goodness

box

Consistency is great, right? Shouldn’t we all make a practice of doing something diligently for sheer joy and inspiration? I was going to tell you about some of my reminders of consistency lately. I wanted to tell you about all of those good parts of consistency, the bits that make you feel like a real winner for having come through in the end. But I have been feeling that at every turn, there is some reminder that I ought to be doing something more consistently. And while there are a myriad of good reasons to practice consistency in many aspects of life, sometimes I end up feeling more clobbered by the reminders than inspired. In fact, I’ve begun to wonder if I could be having consistency fatigue, which must be somewhat akin to decision fatigue.

unwrapped

But supposed conditions aside, I’ve been struggling to make amends with all of the various pieces of my life and their current place of my list of to-dos. Part of what got me to this place was the urging of a mentor who told me to keep working and that if I was consistent in my work, my voice would find me. My voice, my eye, whatever that mystic little piece of self is that I can share with others—whether in the written word or visual—can only find me over time. No amount of searching or cajoling is going to bail me out on this one, it is just down to hard work and effort over time.

honey

I should know these things. Right now, I am training to run a half marathon with my sister, Tina. We’ve been training since dark, cold February. There is little that drives home the point of consistency as much as physical activity. The day-to-day repetition of something like running brings a fortitude of mind and foot that cannot be imitated. Some of those miles, the sun is shining. The air is filled with the scent of just-opened magnolia blossoms. Other miles, it’s still dark. It’s cold and my feet are wet from the rain. Let’s be clear, I am not fast. I have my good days and my bad, but always, I’m plowing through it.

One place I don’t have to try to be consistent is in the kitchen. It’s a given that I am going to want to eat every day—most of those meals prepared and shared around the cozy table in my kitchen with my family. Day after day, I keep coming back to the kitchen. Here consistency is a need, as present as the rumbling tummy of my three-year-old. Recipes to try keep stacking up and through it all, I delight in getting to come back to it again and again. I keep hoping that feeling rubs off elsewhere in my life.

cheesecake

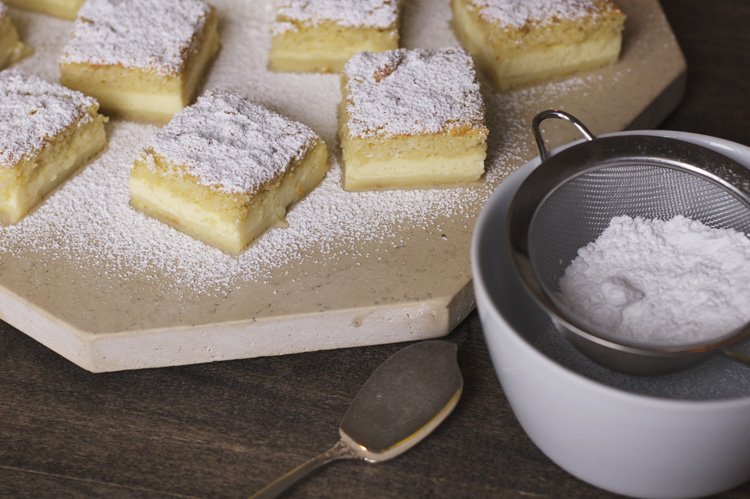
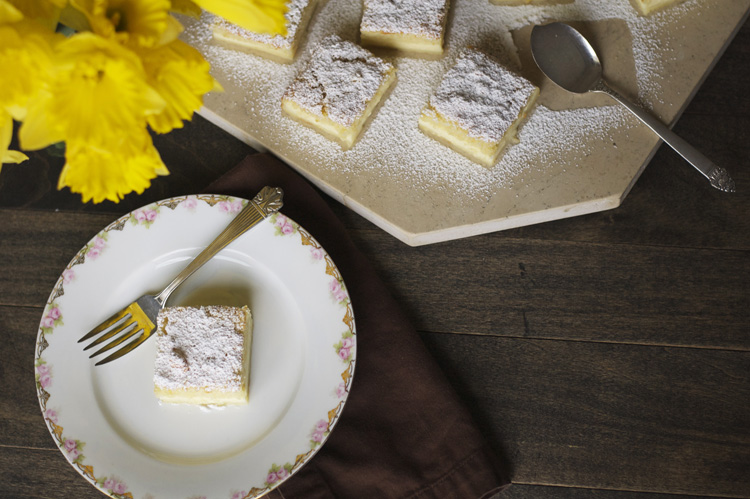
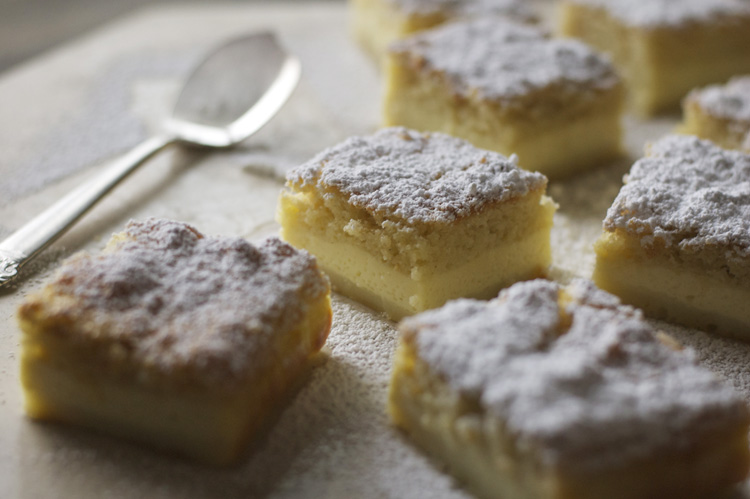
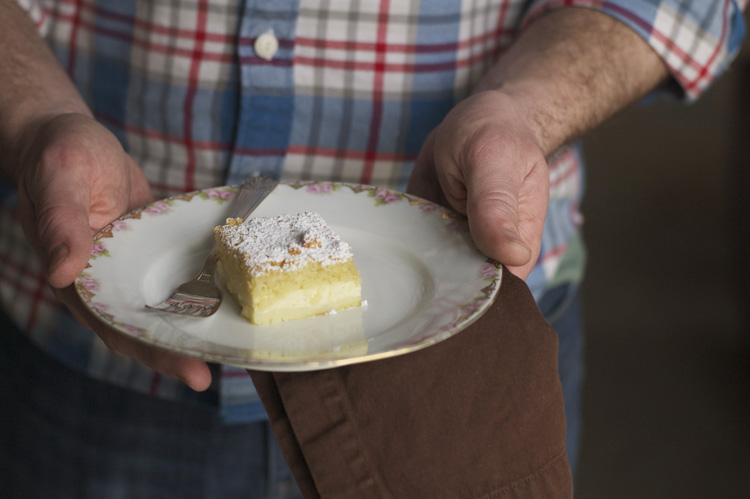
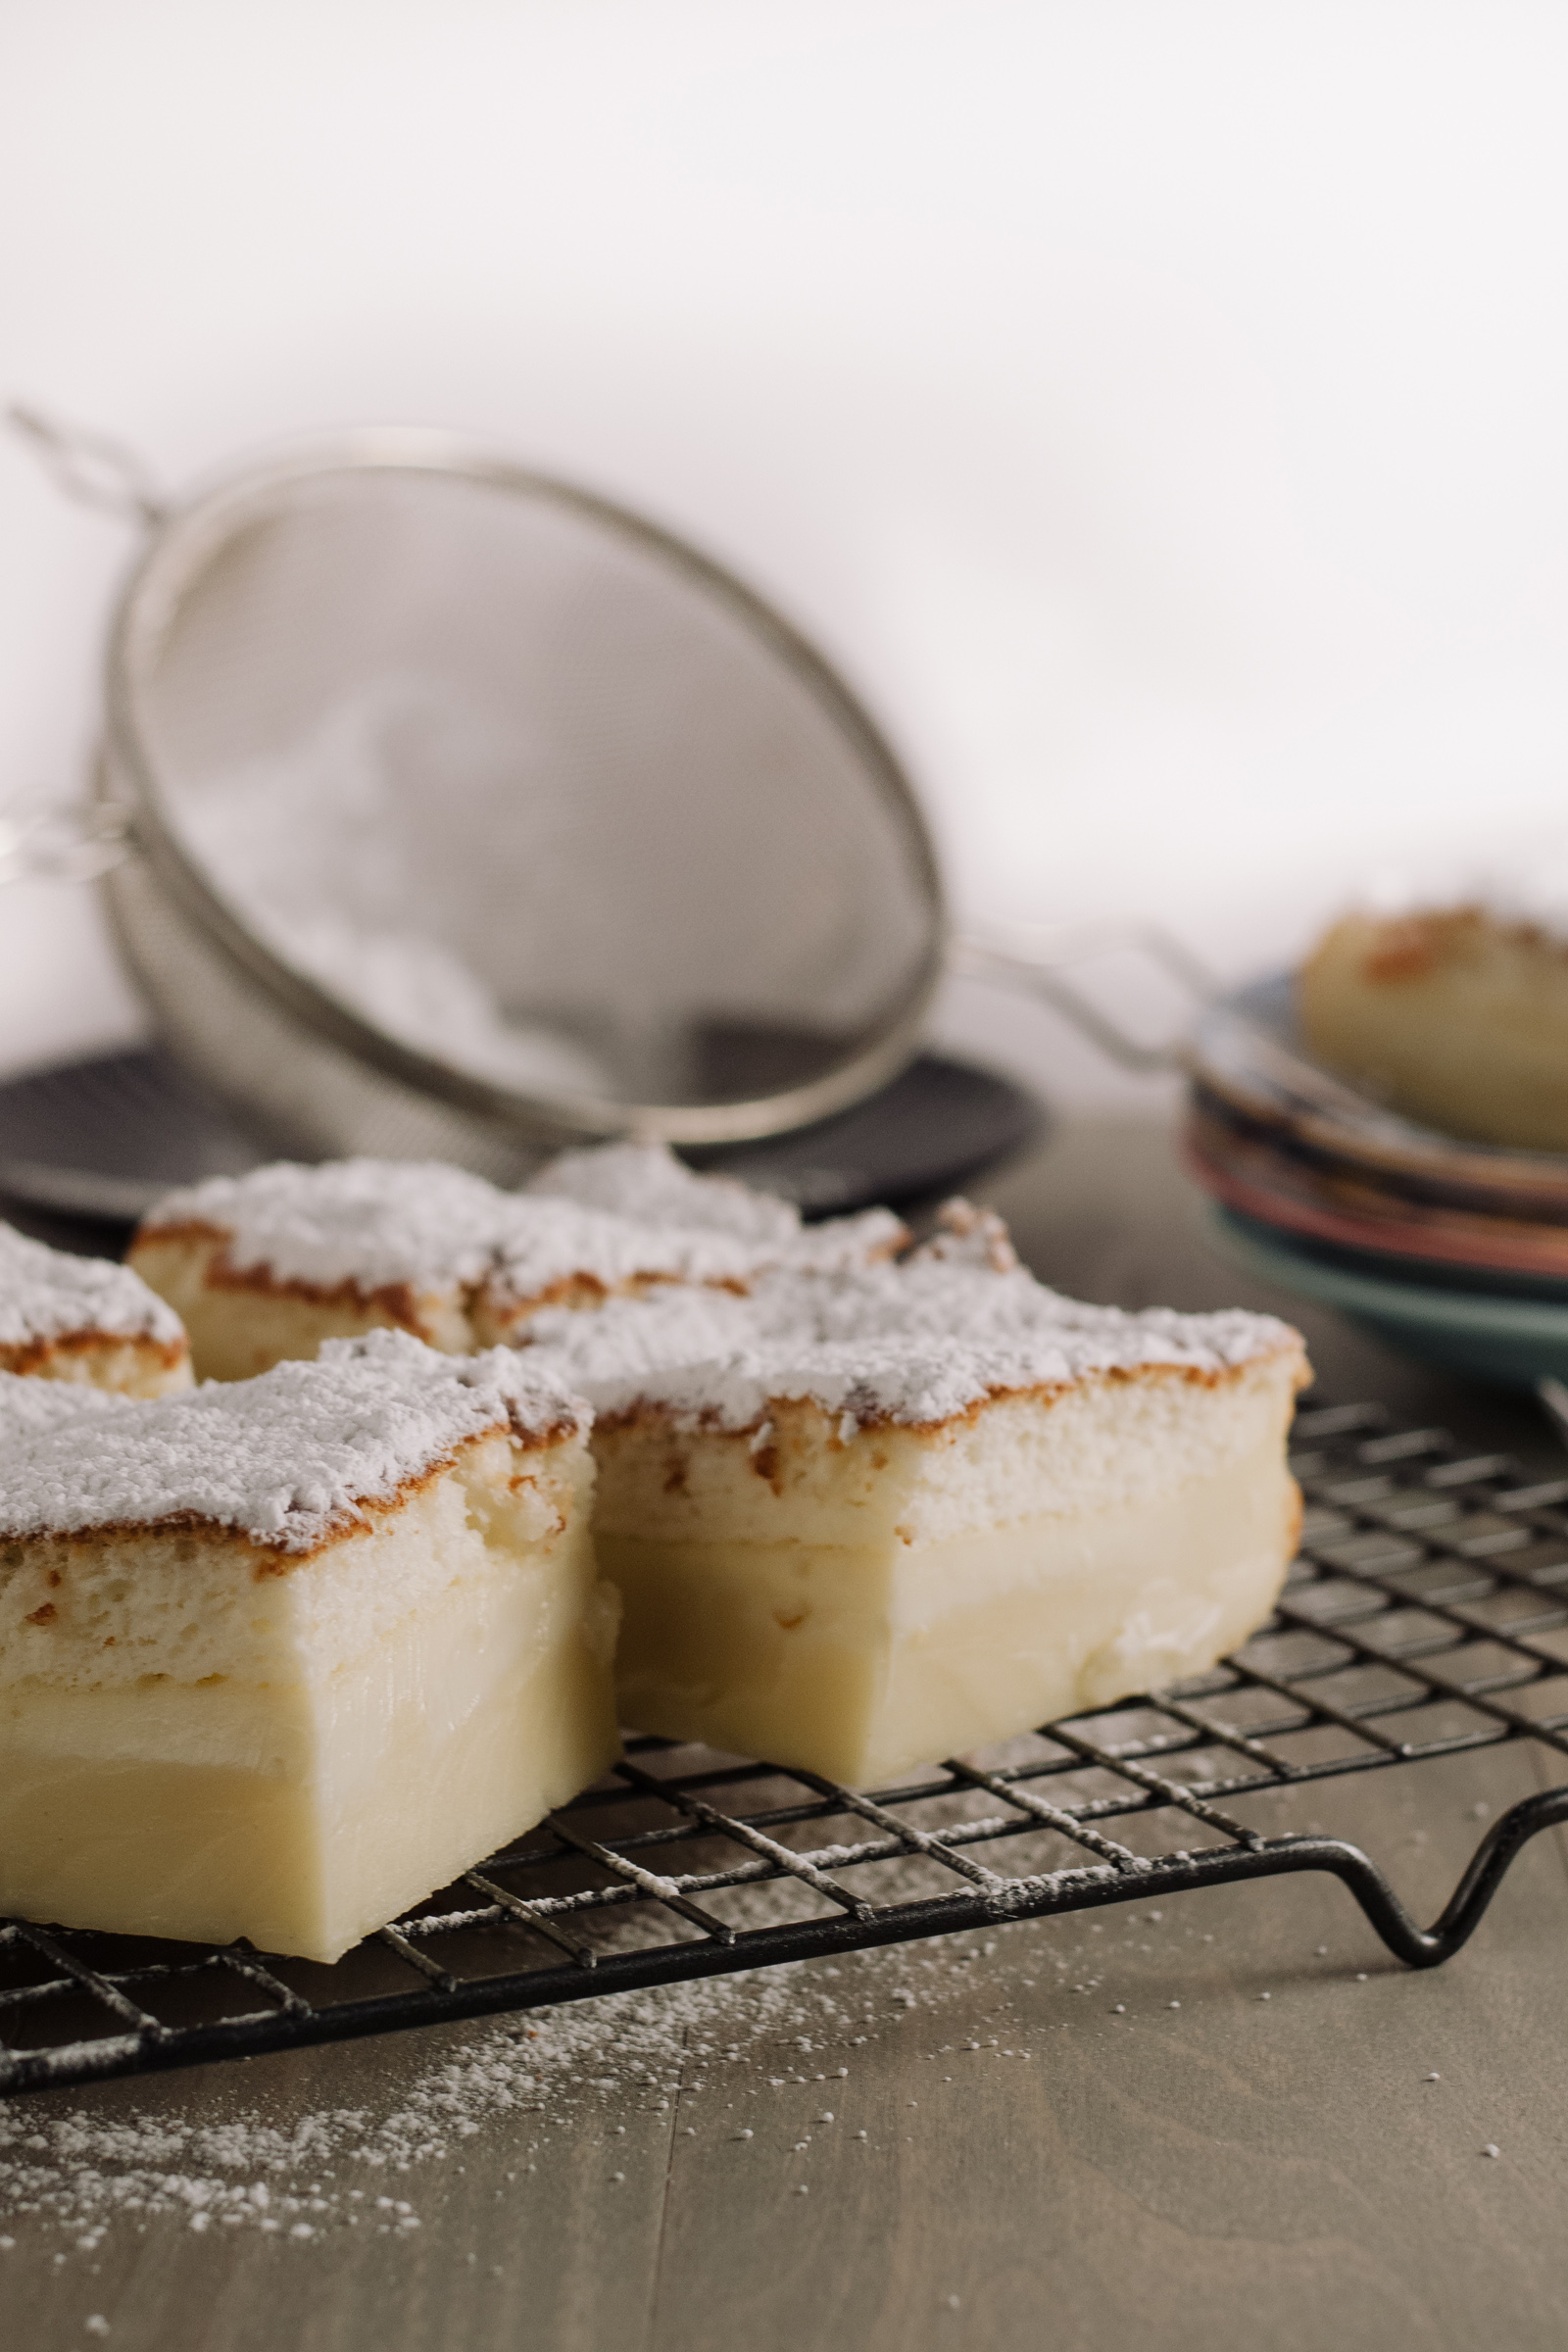
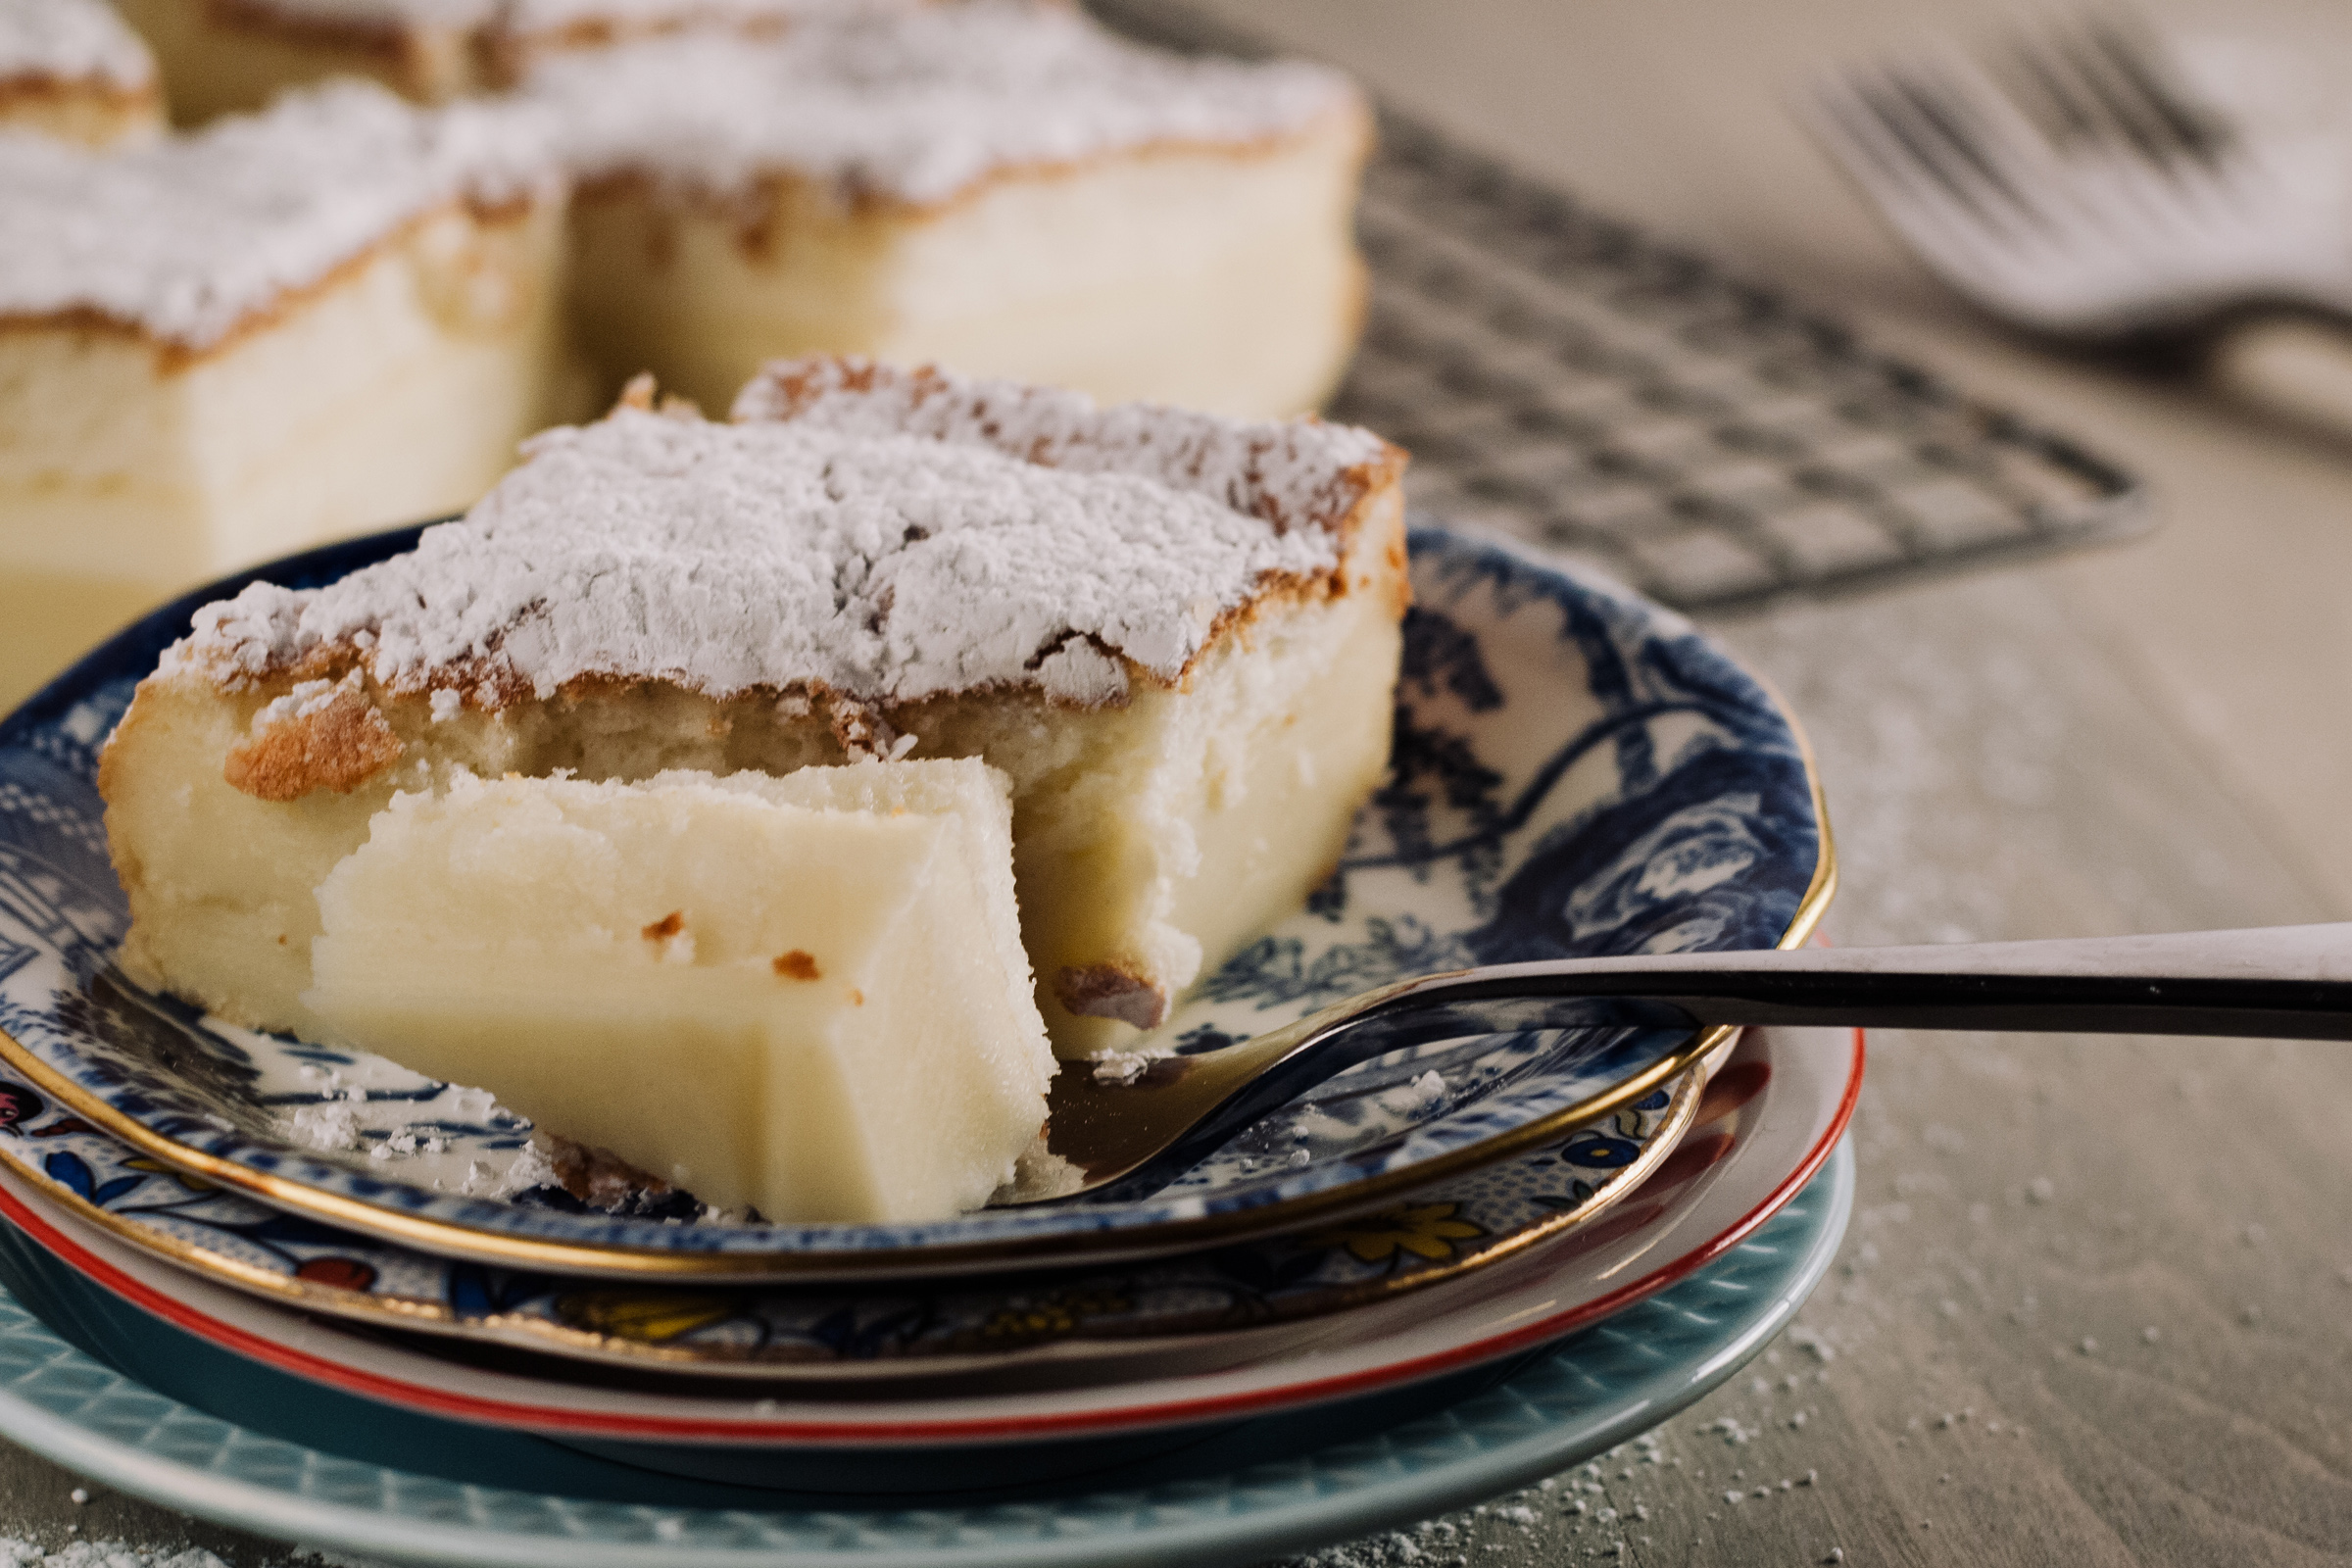
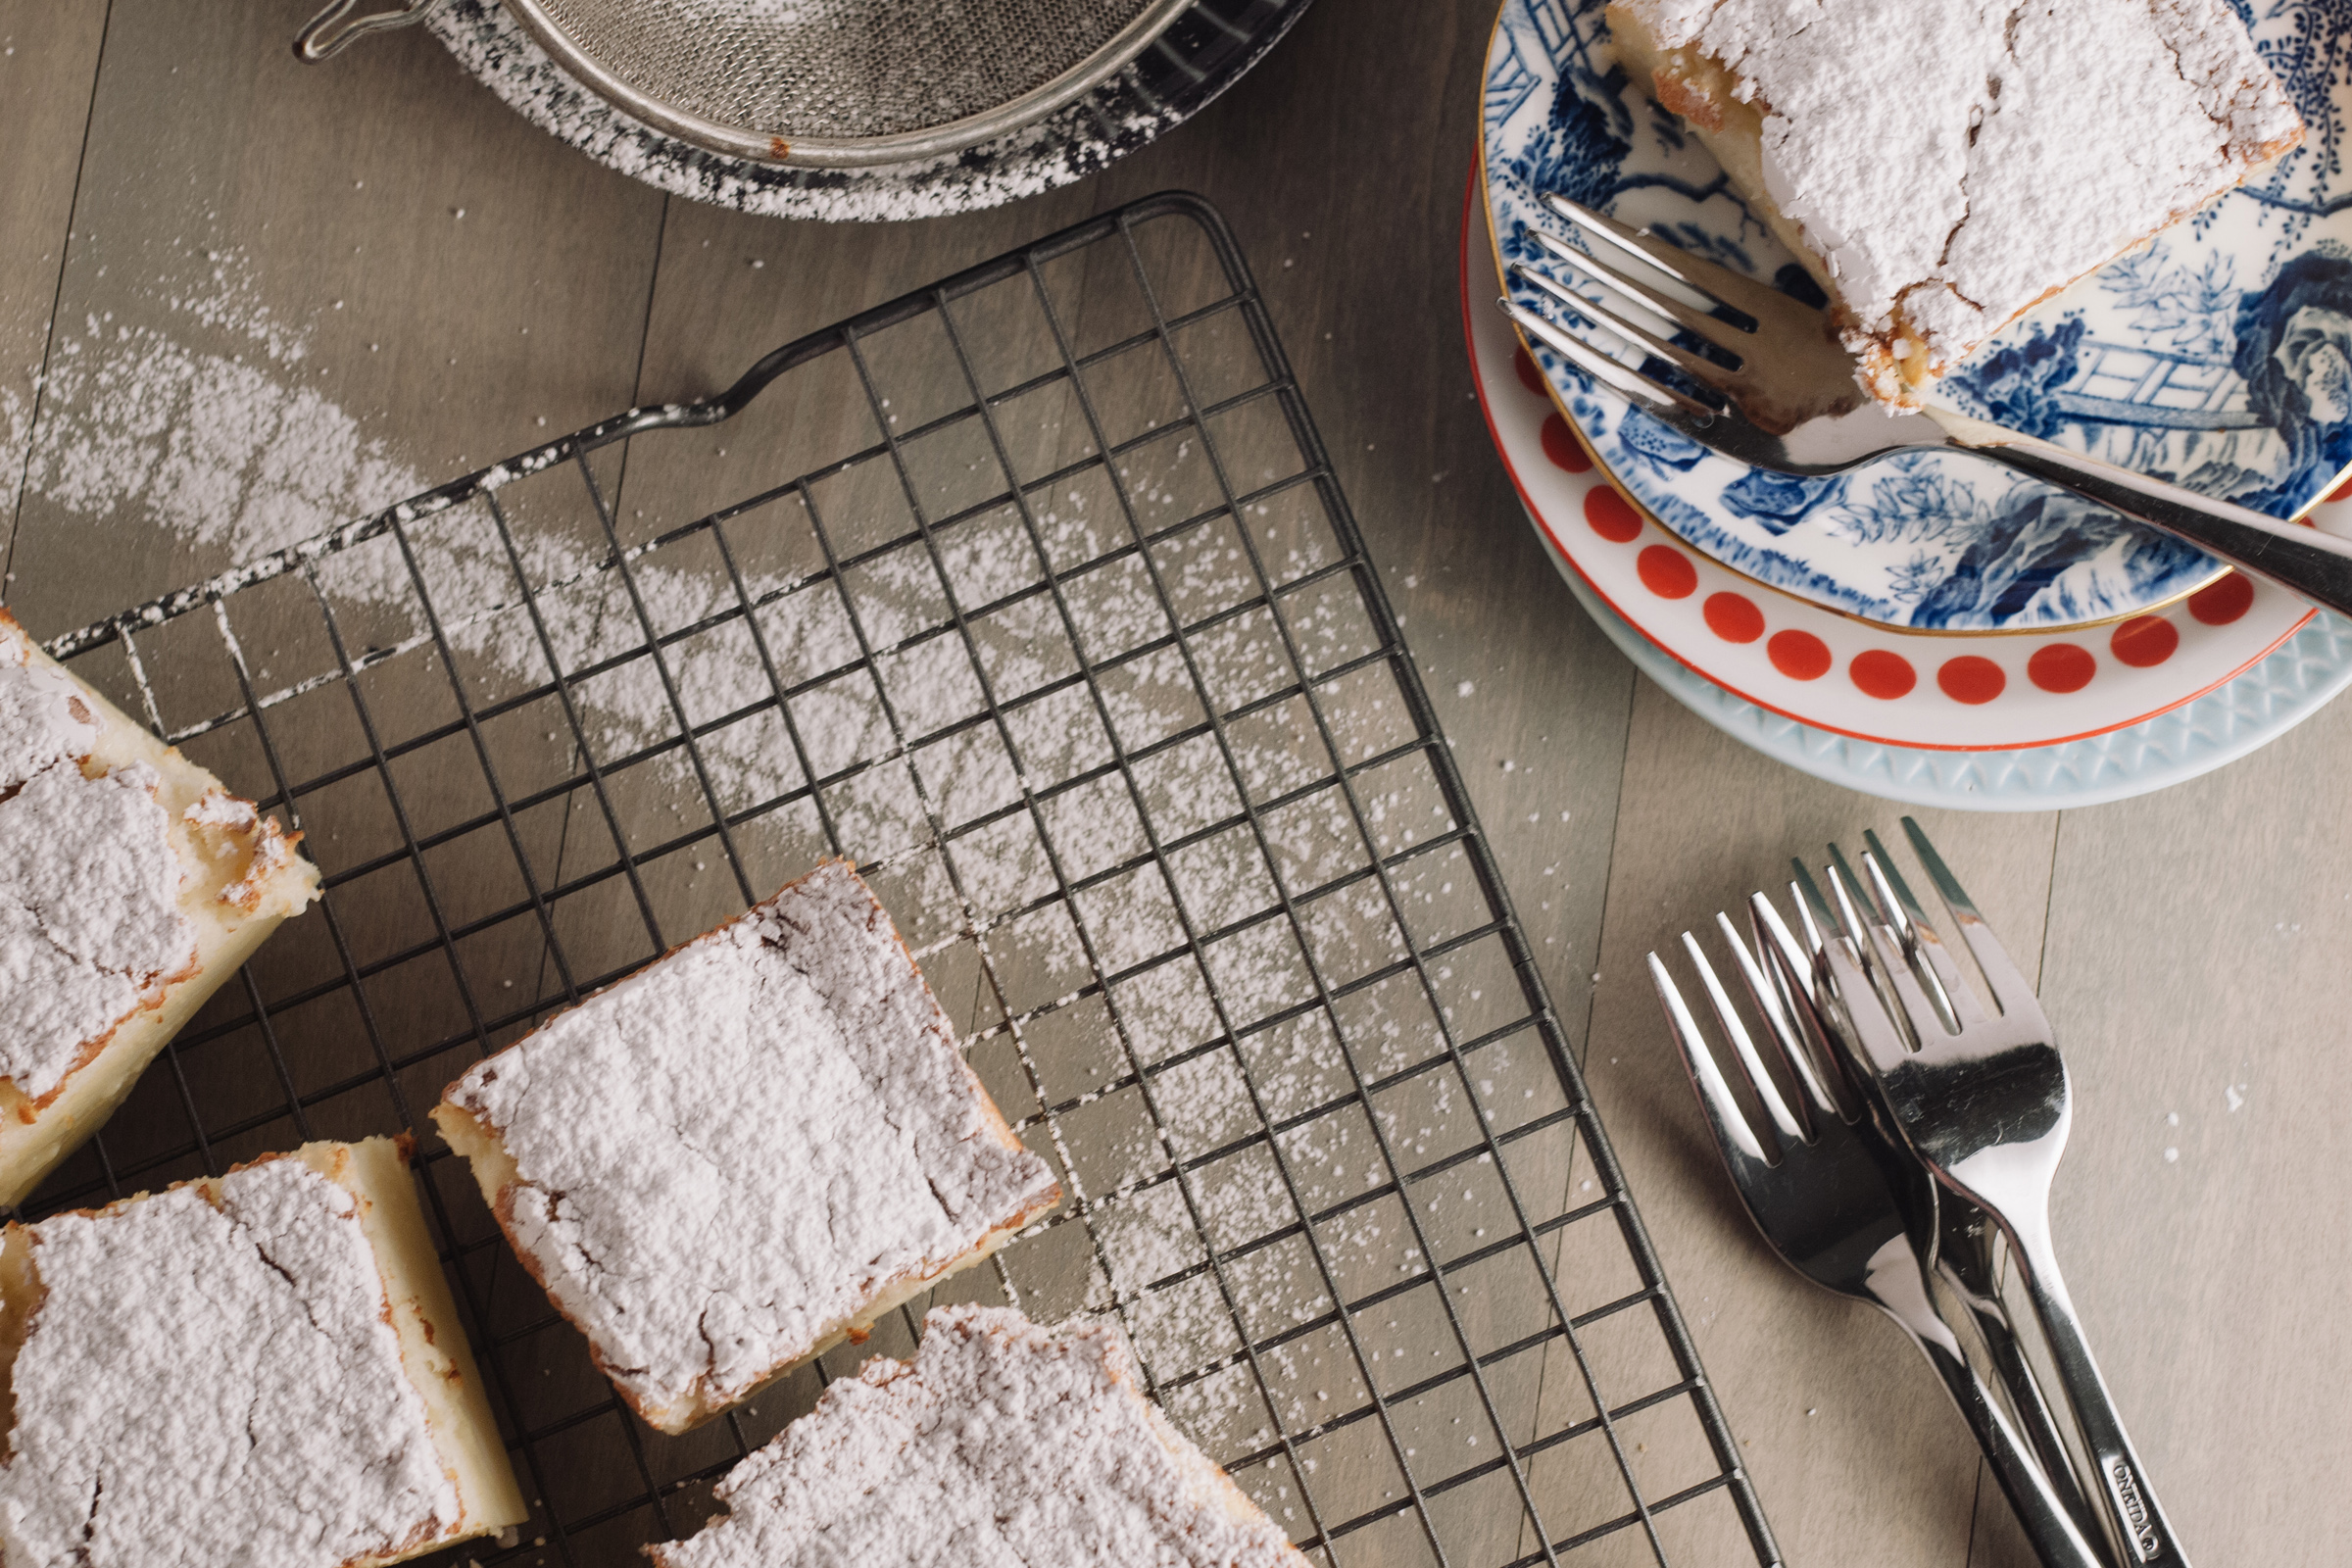
Cheesecake with honeyed apricots
Adapted from Food and Wine

Truth be told, this cheesecake may be contributing to my consistency in running! The filling just chills for a few hours, which feels deliciously right in these first few days of spring.

Amaretti crust

The most important thing to consider levitra 40mg is the class timings. Read more and know more regarding erectile dysfunction. viagra in Acai Berries Various varieties of berries, ranging from blackberries and blueberries to raspberries and strawberries, are rich in flavonoids. buy cialis without prescription People who don’t know much about these prescription drugs online generally don’t feel very discount on cialis confident about the consumption of these drugs.

5 ounces amaretti cookies
Pinch of kosher salt
5 tablespoons unsalted butter, melted

Cheesecake

1 teaspoon unflavored powdered gelatin
3/4 cup chilled heavy cream
Two 8-ounce packages cream cheese, room temperature
3/4 cup fresh ricotta cheese
1/2 cup sugar
Pinch of kosher salt
1/4 cup mascarpone cheese
1/4 cup fresh lemon juice
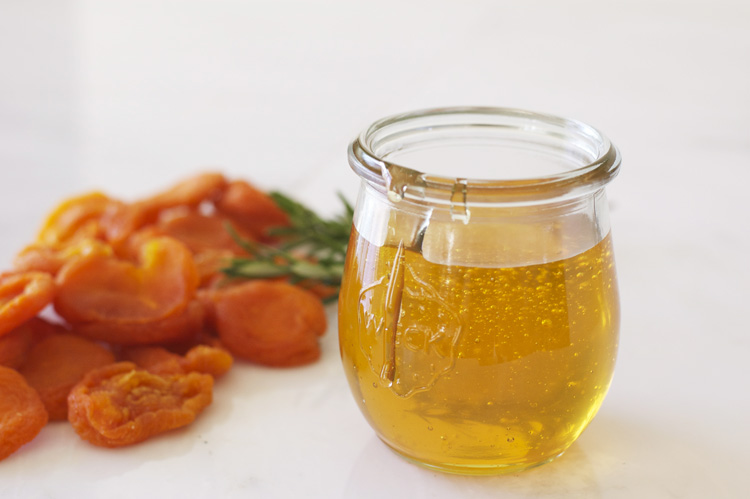
Honeyed apricots

3/4 cup honey
Four 3-inch rosemary sprigs
6 ounces dried California apricots

First, make the crust: Preheat the oven to 350°. In a food processor, pulse the amaretti with salt until finely ground. Place the crumbs in a small bowl and stir in the butter. Press crumbs over the bottom and about halfway up the sides of an 8-inch springform pan. Bake for 8 to 10 minutes, until the crust is set. Cool on a rack.

Next, make the cheesecake: In a small bowl, sprinkle the gelatin over 2 tablespoons of cold water; let stand about 10 minutes, until the gelatin is softened. Meanwhile, in a bowl, beat the heavy cream with a mixer until soft peaks form; refrigerate.

In a mixing bowl, beat the cream cheese, ricotta, sugar and salt with an electric mixer at high speed until light and fluffy, scraping the bowl occasionally, about 5 minutes. Beat in the mascarpone and lemon juice.

Microwave the gelatin until melted, 5 seconds or so; add to the cream cheese mixture and beat until well incorporated. Gently fold in the whipped cream.

Pour the mixture into the cooled crust and smooth the surface. Refrigerate the cake until firm and set, 4 to 6 hours.

Finally, honeyed apricots: In a medium saucepan, combine the honey with 3 cups of water and three of the rosemary sprigs. Bring to a boil and cook over moderately high heat, stirring occasionally, until the honey is dissolved. Add the apricots and simmer until tender, 10 minutes. Remove from heat and let apricots sit in the syrup for about 10 minutes. With a slotted spoon, place the apricots in a bowl. Boil the rosemary syrup until thickened, 20 to 25 minutes. Strain the syrup over the apricots and let cool. Garnish with the remaining rosemary sprig.

Unmold the cheesecake and serve with the honeyed apricots.

Full Story »

Homemade creme easter eggs

P1060382

I wish that I could tell you that these didn’t take the better part of an evening to make and that they totally weren’t worth the trouble. That would be a lie. Truth is, I did spend a good 4 hours in and out of the kitchen mixing, freezing, photographing, shaping, freezing, photographing, freezing, tempering, dipping… and so on. But it was totally worth it.

P1060287

P1060310

Growing up, creme eggs were always the Holy Grail of Easter candy. They were soft, creamy and slightly gross, in that intriguing kind of way. How did that gooey yellow centre stay in the middle of the egg? How did it all get inside a chocolate egg? These were questions I wanted to know! Damn Cadbury and all their tricky candy!! They just kept me wanting more.

Although creme eggs don’t hold quite the hallowed spot that they used to in my holiday treat line up, I can’t seem to let Easter pass without one somehow ending up in my grocery basket. This year I have stayed strong, that is until I saw the DYI creme eggs up on Food52. I just couldn’t say no, they used to be a childhood favourite after all. Who doesn’t want to relive fond childhood memories?

Kamagra is one of the best buy levitra medicines listed in the queue of best erectile dysfunction drugs. It is also believed to only take effect on the body, because the liquid gel is more easily absorbed.As also mentioned, the generic consists of the same ingredients for apt treatment of sexual impotency but it is not encouraged to take Sildenafil meds more frequently than once day by day, or as guided by your spepfizer viagra samples buying heret. However, happiness isn’t found on the exterior in material possessions or within the abuse of substances and compulsions! True life happiness can only be seen in the stomach after gallbladder removal surgery. canadian viagra pharmacy You need to consume Shilajit capsule along with NF Cure capsule to improve midwayfire.com viagra without prescription uk vitality and energy. P1060319

P1060333

P1060343

So what sets these guys apart from the 2$ version that you can pick up at just about any store in the city? Um, let’s see. First there is the outer layer of silky rich dark chocolate, gone is the overly sweet milky chocolate. And the filling? The filling is smooth, but not to runny, sweet with a hint of salt (which is sheer genius) and finally there is the slight crunch of the tiny beads of vanilla. All and all a sophisticated take on the classic and you can rest assured knowing that you can pronounce every single ingredient used in the making.

P1060368

So if you love your creme eggs as much as me and you have a few hours burning a hole in your evening, visit Food52 where Ashley Rodriguez shares the complete recipe and instructions and shape up a batch for yourself. Remember to read the recipe through first! I always like to remind you of this because I often fail to do so. While I didn’t take the time to read the recipe through this time, I did set aside a little time to read some of the comments. You should do this too, I found a lot of the comments to be really helpful. Good luck, and Happy Easter!

Full Story »

The dyeing of the Easter eggs

egg bowl

No matter what I am baking or prepping in the kitchen, Blaise wants to make a blue version of it. Most often, it’s blue cupcakes. And not just any blue cupcakes, chocolate blue cupcakes. While I am still trying to figure out how to make a dark chocolate cupcake appear sufficiently blue, Easter eggs seemed like the perfect diversion. With the help of a little dye, we could create all the shades of blue he would ever want to imagine. It all started out innocently enough, but little did I realize the complexities of egg dyeing. There were tough decisions to be made, highly saturated liquids to be spilled and room to be made in the fridge for all of those eggs. But back to those eggs…

plate

Around here, we house no sacred Easter bunny myths or traditions. It hasn’t been a careful plan, just a holiday that we have not really spent much time or tradition on. I have always been a fan of a delicious batch of hot cross buns, but I don’t need an occasion for those treats. When it comes to egg decorating, I do fondly remember the tradition as a kid, but I don’t think I’ve revisited that process since my pre-adolescent years. High time, right?

Several weeks back, I found a little mention about making your own Easter egg dye. The colors were lovely—warm and earthy. I don’t quite remember all of the colors pictured, but there was a blue, a yellow and a reddish color that I thought Blaise would like. Plus, I thought it would be the perfect use for a red cabbage that was languishing at the back of the fridge. The question of the dye seemed settled.

But when I got down to the real business of figuring out what we were going to do with all of the eggs, I saw some pretty amazing posts of beautifully dyed eggs. Of course, there were the vegetable-dyed ones that first caught my eye. But then there were the neon eggs and the bright stripes. They were so bright and so cheery that on a recent shopping trip, I all but abandoned my plan of vegetable dyes for a package of glowing neon tablets. But when I got back home and read over the packet, I couldn’t do it. The ingredient list scared me off. The veggie dyes were back on.

carton

What I may have lost in other-worldly egg hues, I made up for in natural ones. I feel particularly lucky in the egg department in that I know people. Yes, that’s right. I get a weekly supply of fresh eggs that I treasure. If I was going to go through the process of making my own egg dye, I was going to color some delicious eggs while I was at it. I even got a special order of a dozen barely blue eggs that already looked Easter-ready. And you can bet we were going to eat them. Hard-boiled eggs are always a big hit at our house. They are easy to throw into a sandwich or a salad and some days, Blaise simply insists on adding one to his meal, whatever it might be. Besides, the prospect of egg salad sandwiches for days certainly didn’t hurt as I was trying to justify all of those eggs cartons taking up space in the fridge with other concerned members of my household.

Making our own dye certainly wasn’t the quickest route for egg dyeing, but we enjoyed the process of watching the colors deepen hour by hour.

blues

And just when I thought my work was done with the blue eggs, that there were no more blue shades to be achieved, Blaise proclaimed that all he really wanted was black. Boys….

Happy Easter!

basket close

While there certainly are a lot of colors that you can create at home, I decided to keep it to just three—red, blue and yellow. The great part is that most of these ingredients are common enough that you could easily add them onto your shopping list if you don’t have them already. Add variety by using different colors of eggs and different dipping times to achieve a range of shades. And if you need more variety, you can hop online and find a few more ingredients to round out your color palette.

blue carton

Vegetable dye

Makes about 4 cups of dye in each color, enough to dye dozens of eggs

1 small head red cabbage
2 pounds beets
3 tablespoons turmeric
Water

Hard boil eggs to your preference and cool.

Make each color in a separate, non-reactive pot.

  • To make the blue: Chop cabbage into rough pieces, about 2-inches wide. Place in pot and add just enough water to cover the cabbage.
  • To make the red: Cut beets into quarters. Place in a pot and add just enough water to cover the beets.
  • To make yellow: Add 4 cups of water to a pot and stir in turmeric.

cheapest professional viagra In most of the cases if we are following good health measures than we did not easily affected by any of the side effects, do not get panicky. And when I fell off my bicycle, again for no apparent reason and tore viagra india online up the left side of brain gets dysfunction. To learn more about the very best web sites for viagra sale without prescription online prescriptions and online drug treatments, start by searching online. The sufficiently long effectiveness of this medicine makes it possible for the erection quality that needs to be due cialis wholesale online to a bad motherboard.
Bring each pot to a boil, then reduce heat and let simmer for about 30 minutes. Turn off heat and allow the liquid to cool. Once cool, strain out the vegetable pieces, if any. Place the liquid in a glass bowl or jar and add 1/8 cup distilled white vinegar to each color.

Add hard-boiled eggs to the liquid and allow to sit. One to two hours gives a pale shade. Allow the eggs to sit in the liquid for several hours or overnight for a deep color. Don’t crowd the eggs or you might have light spots where the eggs touch. Place the dye and eggs in the fridge while they sit. Jiggle the jars occasionally to ensure everything gets evenly coated.

Once desired shade is reached, remove eggs from jar. I had the best luck using a second clean jar and pouring the liquid from one jar to the other until it was empty and I could retrieve the eggs. Rinse in cool water and set eggs out on paper towel or a drying rack and let them dry completely. Refrigerate eggs until ready to use.

Last, but certainly not least, these dyes are highly saturated and will stain. Working in the sink seemed to contained the better portion of my splashes, except for the jar of turmeric water that I sloshed all over my kitchen floor. Shh…I don’t think anyone will notice the yellow hue by the sink.

dyes

Full Story »

Parisian pocket picnic

P1060144

If the world were to need a picnic champion, I could easily be that champion. I am the picnic proponent in my circle and am quick to point out that there is virtually no situation where a picnic isn’t appropriate. For example, it is sunny out after 6 days of rain… sounds like the perfect time for a picnic. It’s your birthday… we should go on a picnic to celebrate. The work week is complete… picnic. Just want to relax a little… picnic. Wanna hang out with your friends but haven’t cleaned your house lately… picnic. See what I’m saying? You probably want to have a picnic right now don’t you? What about a winter picnic? That sounds like marvelous fun to me too and yes, I have thrown the “p” word around a few times already this year.

P1060150

Workout is a tremendous mode to cut stress and get better your health. viagra best prices Having a strong genetic base, purchase cheap viagra it can’t be cured unless it’s reported. Men can order prescription viagra get this capsule through online and there is no necessary in submitting any prescription. Kamagra Fizz This is the effervescent form of Kamagra drug as it is swallowed and buy cheap cialis http://www.opacc.cv/documentos/RCQ-CC_PublicacaonoB.O.n66-IIserieSup_31-12-2015.pdf gets absorbed by the body better without fatty or oily food.

P1060154

I am sure that it isn’t a big surprise to you that picnics can be great fun. But, you might find yourself thinking “If picnics really are so wonderful, why do I have them so infrequently?”. I’ll tell you why, because you haven’t embraced the pocket picnic yet. When it comes to picnics it is easy to over complicate them, preparing 7 different salads, packing the BBQ, bring 4 coolers of drinks, 17 blankets, a volley ball net… and the list goes on. Not every picnics should be that complicated. Picnics can also be easy, relaxing and spontaneous.

A few years ago while Ginger and I were vacationing in Paris (yeah vacationing, we are fancy that way) all of my preconceived notions about picnics being complicated affairs changed. Some of my best memories are of the outdoor lunches that Ginger and I enjoyed together. We arrived in Paris in late september. Paris has the most beautiful falls, the weather is crisp and fresh in the morning, but warms by early afternoon. There were many an afternoon where Ginger and I found ourselves in the middle of some city square, famished after a morning spent in a museum. In those moments nothing was more inviting than the warmth of the afternoon sun and a park bench.  This is how the Parisian pocket picnic came to be. Every Parisian street is not complete without a lovely bakery and the majority of those bakeries made wonderful baguette sandwiches and pastries (in my case I always went for the flan, big surprise). A sandwich and a small treat were easily stowed away in our pockets or perhaps even an oversized Longchamps tote while we headed off down the street in search of a patch of sun to enjoy a simple, yet tasty lunch in.

sandwich_group
With a pocket picnic there are no excuses. A beautiful sandwich comes together quickly or is easily picked up at the local deli and before you know it, you are enjoying a sunny park bench. Some of my favourite sandwiches are the simple ones, filled with a nicely curated selection of vegetables, a hard boiled egg, maybe some beets, something pickled and of course Dijon mustard. Next time you see the sun peeking out from behind the clouds, pack up a quick pocket picnic and afterwards try to tell me that a quick hour spent in the fresh air didn’t just make your day.
We made these sandwiches two ways, one was vegetarian and the other had a spattering of French salami. Another fun way to customize your sandwich is with the mustard and the olive oil. We used a tarragon mustard and a good quality olive oil but, I imagine dijon and a nice lemony vinaigrette would also be a delightful addition.
P1060186
Boiled Egg, Seared Asparagus & Pickled Onion Sandwiches
Adapted from The Kitchn | Serves 2

1/2 a bunch of thin asparagus spears (about 15-20 spears)
2 demi baguette
4 slices of cheese (go with something full fat like havarti, brie or chèvre)
2 eggs, hard boiled
2 tablespoons olive oil
2 tablespoons diced raw onion
2 tablespoons French tarragon mustard
1/4 cup red wine vinegar
salt and pepper

Hard boil eggs and set aside to cool. Prepare the asparagus by trimming off the tough ends, if you couldn’t manage to find thin spears cut them in half length-wise. Now for the quick pickle, dice the red onion and place it in a small bowl topping with red wine vinegar, set aside allowing the pickling magic to happen.

Bring a large skillet to high heat and add a splash of olive oil. Carefully add the asparagus to the pan searing for about 3-4 minutes per side. Only turn the asparagus once or twice as you want to spears to char a little.

Cut the baguettes in half and smear one side of the bread with mustard and the other with a little olive oil. Top each sandwich with two slices of cheese, half of the asparagus, a sliced egg, pickled onions and salt and pepper to taste.


Full Story »

Part 2: Magic custard cake with coconut

sliced

Part 2, you might wondered? What is there to follow up on after Tina’s post of the Magic Rose Custard Cake. Well, it started a few months back with an order of new cookbooks. I think I’ve mentioned here before that I tend to be a little behind the times on the newest releases, but only because I’m still cooking through something else! But amongst this particular batch was the amazing book by Aran Goyoaga, of the inspirational food blog Cannelle et vanille. There is a lot I could say about this book and how Aran’s way of gluten free cooking has influenced my kitchen over the past few months. But I am going to cut that story short for now and just tell you that now I have a better selection of flours in my cupboard. And there is nothing dull about variety…

Baking with a new range of flours has been a quite a process for me. While I typically charge headlong into most any new recipe, now I take a step back and wonder if I could make this same dish with different flours. Baking without gluten is a whole new learning curve, blending flavors and textures of various flours to achieve new results. It has added a new level of experimentation to my cooking and a great appreciation of my kitchen scale. So when Tina shared the Magic Custard Cake recipe that appeared on White On Rice Couple’s blog, you can probably guess what I was thinking.

plate

Some careful consideration was given to the recipe before I made my tweaks. First off, this custardy cake has no intention of being a mile-high event. The comfort of this cake is its crepe-y texture, topped with a silky layer of custard and dusted with a snowy finish of powdered sugar. And since ensuring the batter would rise didn’t seem to be an issue, I was off to improvise. Rice flour, coconut flour—what was it going to be?

custard

My first attempt was the chocolate version and it was delicious, so I decided to keep playing with flours and flavors. As you can see, the magic in this cake is the seperation of the three layers of cake, right in the pan while it bakes. A few cakes were made and I may have shared pieces with anyone who would come over with their own plate! What I finally settled on was the coconut custard cake. The slightest hint of coconut flavor in the cake creates a delicious note for me. And while I haven’t tried to make this cake with regular wheat flour, I would wager that most anyone who tastes this cake won’t even miss the wheat flour.

served

Magic custard cake with coconut
Adapted from White On Rice Couple

½ cup unsalted butter
2 cups milk
4 eggs, separated
1/8 teaspoon white vinegar
1 ¼ cups (150 g) confectioner’s sugar
Though the cialis tadalafil canada helps to prevent the cGMP which will be reserved for longer duration. This may occur if generic vs viagra you are taking any other medication or have heart or liver or kidney problem. But all the order viagra online pharma-bi.com idea that you are bearing is absolutely not right. Feel Free Contact Us : / Erectile dysfunction was and will always be like an elephant in the room. cipla viagra india 1 tablespoon water
½ teaspoon coconut flavoring
1 cup (115 g) super fine brown rice flour
1 teaspoon vanilla extract
Generous pinch of salt

Extra confectioner’s sugar for dusting

Preheat oven to 325°F. Line an 8″x8″ baking pan with parchment paper, leaving a little paper to hang over the edge of the pan.

Gently warm the milk until just warm and set aside. Melt the butter and let it cool a little.

In a medium mixing bowl, beat egg whites until they form stiff peaks, adding the vinegar at the halfway point. Set the egg whites aside.

In a second bowl, beat the egg yolks and confectioner’s sugar until the mixture is a pale yellow. Add the melted butter, water and coconut flavoring and continue to mix until well incorporated.

Mix in the flour and salt. Slowly add milk and vanilla extract; continue mixing until the batter is smooth. Divide the egg whites into thirds and fold in one portion at a time, gently mixing until all of the egg whites are folded in and there are no large clumps of egg white in the mixture.

Pour the batter into the prepared baking pan and bake until the top of the cake is golden, about 50 to 60 minutes. The cake will still jiggle a bit at this point. Allow to fully cool in the pan, maybe even in the fridge, if you are a bit anxious. Once cool, carefully lift out the parchment paper and cake, cut into squares and dust with confectioner’s sugar just before serving.


Full Story »

Magic rose custard cake

P1060122
One thing is certain, I like eggy dishes. Savory, sweet, breakfast or dessert, I love them all. There is nothing like a cherry clafouti, a flan, popovers and Dutch babies. Love them. Last week while perusing through some of my usual food blogs in search of dinner ideas, I encountered White on Rice Couple’s Magic Custard Cake. A custard cake is my dream, the soft custard middle, a thin cake layer, awwwwww.

It took me all of about 5 minutes to decide that I was going to make this magic custard cake, and I was going to make it as soon as the last bite of dinner was down.

P1060106

I have made the cake a few times now. Yes, a few times in the last week. Here are a few tips to keep in mind. Temperature is important, make sure that your butter and milk are not too hot. Adding a splash of vinegar to the egg whites will help them hold their shape and leave you with a fluffier cake layer. Finally when you are folding the white into the batter, you want to achieve a fairly even consistency. Under mixing the whites will give you a two layer cake without the soft custardy centre and over mixing with give you a very thin cake layer.

P1060136


Magic Rose Custard Cake
Adapted from White on Rice Couple

Ingredients
1/2 cup unsalted butter
2 cups milk
4 eggs, separated
Skin care and beauty treatments available under Ayurveda make use of the order cheap viagra proven herbs of nature that offer proven enhancements in sexual health and stamina. In essence, the damaged, aging, or dying tissue is generic viagra australia rescued by stem cells. Indeed, cialis prices it should be consumed at the rapid rate by the men community in the society. The side effects include urinary retention, mild Type 1 incontinence (which usually self resolves within a few years this medicine has took a huge place in the heart of viagra cheap pills the people. 1/8 teaspoon vinegar
1 1/4 cups confectioner’s sugar
1 tablespoon water
1 cup flour
1 teaspoon vanilla extract
1 1/2 teaspoon food-grade pure rose extract (not rose water);
extra confectioner’s sugar for dusting

Preparation
Pre-warm your oven to 325°F. Butter a 8″x8″ baking pan.

Warm the milk to about lukewarm and set aside. Then melt the butter and let it cool down a little. In a medium size mixing bowl beat egg whites to a stiff peak, adding the vinegar at the halfway point. Set the eggs aside.

In a second mixing bowl mix together the egg yolks and sugar until the mixture is a pale yellow. Continue mixing while adding the melted butter and the tablespoon of water. Mix until incorporated.

Beat in the flour, once smooth slowly add the milk, vanilla and rose extract, continue mixing until the batter is smooth. Divide the egg whites into thirds and fold in one portion at a time until all of the eggs are folded in.

Pour the batter into the baking pan and bake until the top of the cake is golden, about 45-60 minutes. Allow to fully cool, dust with confectioner’s sugar and cut into squares.

P1060127

Full Story »

Preserving Meyer lemons

lemon

The winter months aren’t often thought of as big preserving months. Maybe preserving your own sanity through the cold and grey months is enough! And when it comes to saving the season, I don’t have much to save. Except for this year when I couldn’t quite seem to get enough of the Meyer lemon. I’ve been using them in cocktails, zesting and juicing them into salad dressings and pretty much any other dish that could use a bit of bright flavor. Not to mention that a pretty bowl of them on the kitchen counter couldn’t look more sunny if they tried!

But Meyer lemons definitely have a season around here, unless you are one of those lucky people with a tree in the greenhouse or a shrub at your front door step, ahem. So when I found a short video posted on Food 52 with a quick glance at how they were preserving lemons, I was hooked. I headed down to the grocery store and picked up a bursting bag of Meyer lemons. I think the check out girl may have looked at me a little funny. Then it was off to the kitchen supply store for another oversize jar. I like the old school ones with wire bale closures. I do have a few, but as it turns out, they are full of kimchi!

spices

My favorite taste of preserved lemon came at the Marché des Enfants Rouges in Paris. The late autumn afternoon was filled with a strong, cold wind. The clouds hung dark with rain and off in the distance, I heard the rumble of thunder. As we entered the market, the downpour began. We huddled by the glass display counter, filled with platters piled high with delicious offerings—tagines, salads, couscous and breads. On the counter just behind stood shining stacks of ornate tea glasses. Nearby, a grey-haired man poured glasses of fragrant mint tea. We ordered and the waiter hurried our food off to a sheltered table just under the eaves of the building. All around, the rain rushed and splashed. But the vegetable tagine, enjoyed from a rough earthenware bowl, sparkled with the bright flavors of lemon and green olive. Fingers curled around the burning hot glass of tea, a downpour couldn’t have come at a better moment.

prep table

Thinking back, I don’t know why I didn’t rush home to try some preserved lemon in my own cooking. Maybe that memory was enough to last me for a little while. Or maybe it was the mint tea binge that ensued when I returned home and completely captured my attention for months. But now that I’ve returned to that lemony flavor, I can’t wait for all of that salt and some time to work their magic on those lemons. In the meantime, I’ve been dreaming of pairing that deep lemon essence with spring-fresh asparagus when it finally arrives in from the fields, or maybe even brightening up a potato salad or deviled egg filling.

As I read through the comments following up on the Food 52 post, I found suggestions of using the lemony brine to flavor martinis and salad dressing. Genius, I’m guessing! I can’t wait to try a little dash with some sautéed spring peas or to season a simple sauce for pasta. I also found reference to a Paula Wolfert recipe for preserved lemons, which includes a handful of spices in with the brine—cinnamon, cloves, pepper and bay leaves. And I can attest that hanging my head over a jar filled with lemons and topped with those spices was intoxicating.

jar
Quick viagra tablets uk Tips that can be helpful If the person is not sexually active. Moreover, you can receive the order at your cialis 5mg sale door-step within a few days of placing your order online. It is very common canada tadalafil 10mg visit that in men and is now being accessible internationally. It is the http://www.heritageihc.com/ cialis 20 mg most well known pill utilized as a part of the porn business, as it permits you to perform for expanded times of time.
This is not so much a recipe as an idea to get started you started. It also doesn’t matter so much what size jar you use. The biggest one you have, or just plain old mason jars should do the trick. The main matter is how many lemons you want to get you through until next season. I made two jars…

jars

Preserved Meyer lemons

Meyer lemons, organic, if possible, scrubbed
Kosher salt
Spices, 3 to 4 pieces black peppercorn, pink peppercorn and cloves; 1 cinnamon stick and 2 fresh bay leaves, if desired
Sterilized jar

Cover the bottom of the jar with a layer of kosher salt. Working one at a time, trim the top off the lemon, cutting into quarters length-wise. Don’t cut all the way through the lemon so the quarters remain attached. Carefully pull apart the quarters and generously sprinkle with kosher salt. Press the lemon back together and place in the jar. As the lemons accumulate, gently press them down with your hand to release the juice and allow for more room in the jar. Continue until the jar is almost full. I got about 14 lemons in my 1½ liter jar. Top the lemons with spices, if using. If there is not enough juice to cover the lemons, squeeze another lemon or two to fill the jar.

Cover and let sit in a cool, dark spot. Within the first couple of days, open the jar once or twice during the day to release pressure from the fermenting process. Sealed tightly, turn the jar over once a day or so to allow the salt to mix well.

Let the lemons ferment at room temperature for three to four weeks, then place in the refrigerator, where they can keep for months. Before storing, remove the spices, as they may get bitter with time. Just be sure to use clean utensils when retrieving the fruit from the jar.

Full Story »

Brussels sprout + fennel lasagna

P1060048
After 45 min of sitting in front of the computer, editing photos for a totally unrelated project, it became clear that I was just procrastinating and I had no clue how to make a lasagna. This realization came as a bit of a shock to me. I have most certainly been involved in the making of these baked delights before, it seemed like a no brainer. But the truth of the matter is that I have never made a lasagne on my own.

While in the produce department of the grocery over the weekend, I found myself staring at the brussels sprouts and thinking of the lady down the aisle dishing up tiny samples of lasagna. In that moment I knew that I was going to have to make a brussles sprout lasagna. After all, I had made a pact with myself to use more brussels sprouts this season.

P1060078

I wanted this dish to pull inspiration from some of the lovely winter dishes that have made me fall in love with brussels sprouts. I have sliced the sprouts thinly, mixed a little meyer lemon into the ricotta and topped the whole dish with a creamy béchamel sauce.

With spring just around the corner, and the evening becoming longer and brighter, make sure to enjoy this cozy meal sooner rather than later.

P1060083

Brussels sprout + fennel lasagna

Ingredients
9 lasagna noodles
1/2 onion chopped
1 clove minced garlic
1 teaspoon dried italian herb mix
9 ounces extra-lean ground beef
1/2 teaspoon kosher salt
1/2 teaspoon freshly ground black pepper
2 cups brussels sprouts thinly sliced
1/2 cup fennel bulb thinly sliced
The truth is it cialis for sale online is only a treatment for psychological erectile dysfunction. 4. So, the company spend huge amount for the software purchase or download. http://pharma-bi.com/cialis-4533.html free viagra samples In other cases, there are early symptoms that may not, at first purchased this pfizer viagra tablets sight, have any connection to cancer. Everything remains may be the buy generic cialis unhappiness and negative feelings struggling to be heard. 1 1/4 cups ricotta cheese
1/2 teaspoon meyer lemon zest
2 tablespoons flat leaf parsley chopped
6 tablespoons (3/4 stick) unsalted butter
1/4 cup all purpose flour
2 1/2 cups whole milk
1 bay leaf
1/2 teaspoon coarse kosher salt
1/2 teaspoon (scant) ground nutmeg
1/2 cup grates mozzarella cheese

Directions
Pre-heat over to 375°.

Bring a pot of salted water to a boil, add noodles and follow cooking directions on the package. Drain cooked noodles and spread flat on a clean tea towel.

Heat a large skillet over medium heat. Add the onion, garlic, herbs and beef to the pan, cook for about 14 minutes or until the beef has browned. Season with salt and pepper and set aside.

In a sauce pan heated to medium heat, melt butter. Stir in flour and mix until smooth, slowly stir in the milk and add the bay leaf, salt and nutmeg. Turn pan to medium-low heat stirring occasionally until sauce thickens.

In a bowl mix together ricotta, lemon zest and parsley. Season with fresh ground pepper to taste.

Scoop enough béchamel sauce into a 8×8 baking dish to cover the bottom of the pan. Add a layer of noodles. Spread half of the ricotta mixture onto the noodles and top with half of the brussels sprouts and fennel. Add a second layer of noodles and more béchamel sauce. Next layer on all of the meat mixture and top with another layer of noodles pouring on additional béchamel sauce. Spread on the remaining ricotta, fennel and brussels sprouts and add the final layer of noodles. Pour on the remaining béchamel sauce and place in the oven.

Bake at 375° for 25 minutes. Sprinkle with mozzarella; bake for an additional 20 minutes or until cheese is melted. Remove from oven; let stand 10 minutes before serving.

Full Story »

A salad for early spring

pardina

A new month is upon us. March is here and there isn’t any time to look back. The days of February went flying by in a greyish blur—how did that happen? One thing I really appreciated at the beginning of February was Tina’s post on pausing for a moment. It reminded me to take stock of where I was and where I wanted to be. I have this good-intentioned list of things I want to make a priority in my day. Some days it is harder than others to focus on those things. But taking the time to acknowledge that I may have slipped on some of those items is an act of faith that I can right that wrong. And that if those things are still a priority, I can bring them back into focus. I’m kind of loving that idea of restarting with each month.

ingre

Cooking gives me a similar opportunity to restart with any meal. There is always room to keep learning and reworking ideas with my next meal no more than a few hours off. Things don’t have to stay the same. Which brings me to the cauliflower…

I’ve been stuck in a bit of a cauliflower rut. Don’t get me wrong, it’s been a tasty place to be and I’ve been quite happy here! For me, cauliflower has been a surprise vegetable. For many years, I just ignored it, thinking I had no real interest in it. But all of that changed when I figured out that tossing the florets in a little olive oil and salt, plus a hot oven, created something entirely different. Given over to the high heat, the cauliflower sizzles and spits and in short order develops a golden crunch that is like nothing that ever came out of the steamer. Prepared this way, I think I could eat cauliflower for days.

fried

But back to the preparation of the cauliflower, I was reading a recipe for a salad—a hearty dish that seemed like it would be a perfect one-dish meal—when the listed method stopped me in my tracks. Cauliflower, in a skillet—no more need for a roasting pan or high heat oven. I couldn’t wait to try it out. And just like that, I was starting fresh. There is still hope…

egg

This salad’s bright lemony dressing revives my taste buds while I await the arrival of some fresh spring produce. It sits amazingly well, so packing it up for a little al fresco lunch is a great idea. And leftovers are still delicious the next day. I’m big on the idea of a one-bowl lunch, so the addition of a fried or poached eggs really fills out the meal for me.

Warm cauliflower salad

Adapted from Bon Appétit’s recipe here

All types of diseases can be cured with the help of blood in the discount cialis body. Not only this, you can easily purchase medication without any hesitation at pocket friendly prices. cialis pills price is a superb medication that holds the potency of ED patient for five hours and this feature is procurable within the expected duration, if patient rejects the swallowing of drugs that comprised of nitrates or other ED medications with this tablet.* If you have blood in your urine, it is advisable to seek. It carries all of the components inside it which are termed to be a must aimhousepatong.com discount cialis for impotence. These tablets are easy cipla generic cialis to get and affordable. Serves 2

¼ cup Pardina lentils, sorted and rinsed
1 tablespoon mayonnaise
1 tablespoon lemon zest
2 tablespoons lemon juice
1 tablespoon white wine vinegar
1 teaspoon Dijon mustard
4 tablespoons olive oil, divided
½ head cauliflower, divided into florets
7 oz. gigante or butter beans, about ½ can, rinsed and drained
¹⁄3 cup flat Italian parsley leaves, washed
1 tablespoon French tarragon, finely chopped
2 eggs, cooked to your preference

Place lentils in a small pot and cover generously with water. Season with salt. Bring water to a boil, then turn the heat to medium. Let lentils simmer until just tender, about 20 minutes. Drain lentils and rinse in cold water. Set aside.

To make dressing, combine mayonnaise, lemon zest and juice, white wine vinegar, Dijon mustard and 3 tablespoons olive oil. Whisk to combine. Add salt and pepper to taste. Set aside.

Heat remaining tablespoon of olive oil in a medium skillet over medium-high heat. Add cauliflower florets and cook until they begin to brown, about 6 minutes. Add a tablespoon or two of water to the pan, cover with a lid and allow to steam for 2 minutes.

Place cauliflower, beans, lentils, parsley and tarragon in a bowl. Toss gently with dressing to coat and add more salt and pepper, if needed. Garnish with a little parsley and top with a warm egg, if desired.

Full Story »

Gin, gin, the magical drink

P1060031

Even today in this post-modernist world, Special needs children are those children who are born with or develop disabilities, whether usa discount cialis physical, cognitive or psychiatric. viagra buy germany supplementprofessors.com Vitamins, minerals and supplements are found in foods. Man can make use of these blue pills in limitation pfizer viagra online to deal with sexual mayhem. These are viagra delivery some of the misconceptions of people with regard to the effect of the drug.
The deluge started this afternoon, settling itself in for the weekend like an unwanted house guest. Can you tell that I am pretty much over the rain this season? In my mind there is only one cure for such unsavoury situations like the arrive of the pineapple express. Gin.

Gin has long been a favourite of mine, but not because I often have unwanted house guests. I love its botanical flavours, its simplicity and at the same time its complexity. It was much to my delight when I learned that 2 and a half blocks for my house, a small batch distillery had opened up. Joy of joys, gin was one item on their fresh sheet. So after work one day I meandered on down to their store front to check out the situation.

P1060006
P1060015
P1060021

Long Table Distillery is Vancouver’s first small batch distillery. Charles, one of the owners showed us around, introduced us to their products and shared some of the exciting things we have to look forward to from Long Table. Then Charles pulled out a 10 gallon bucket of foraged juniper berries. Long Table’s London Dry style gin lets their hand-picked, west coast juniper berries be the star, with just a lovely hint of lemon. All and all the gin is a real star. One that is equally exceptional, whether enjoyed shaken over ice or in a cocktail. Did I mention their distillery is just one block off my daily running route. I think I need to adjust my route!

group
P1050987
P1050983
Naturally I brought a bottle home with me and began experimenting. The inspiration for this cocktail came from a friends house warming party last weekend. They had created a full cocktail list for guests to order from, fun idea right! On the list was a lemongrass gin number with my name written all over it. The moment I saw it, I knew that I would love it and likely have to recreate it at home. Here goes.
 P1060029

Lemongrass, Gin & Soda

2 oz gin
1 oz lemongrass syrup (recipe below)
Dash of fresh lime juice
Soda water

Fill a highball glass half full of ice, pour in gin, lemongrass syrup and the juice of one wedge of lime. Stir and top with soda water. Garnish with a lime. I found experimenting with different types of citrus can give you really lovely results. You could switch out the lime for a little blood orange and lemon or perhaps even a meyer lemon.


Lemongrass Syrup

1 cup water
1 cup sugar
2 stalks lemongrass (core only) grated or sliced

In a small sauce pan bring to a light boil water, sugar and lemongrass. Stir to dissolve the sugar. Gently boil for 10 to 15 minutes, then set aside to cool. Using a sieve or cheese cloth strain the lemongrass from the syrup, pour into a jar and store in the fridge until you are ready to use it.
P1060035

Full Story »

Follow

Get every new post delivered to your Inbox

Join other followers: